2016/7/25 9:39:27
This post is all about the basics of road bike handling in the real world. The exercises here are designed to help you move more easily through the city, be a steady wheel in a group and stay upright when unexpected obstacles come your way.
Almost everyone can ride a bike and use its momentum to stay upright, but being a good bike handler in any situation takes practice. Good bike handling means your body and bike work together as one. You move in a way that is graceful and in sync with your equipment. It means you ride safely and predictably by yourself and with others. Improving handling skills builds confidence in a million different ways.
More: 7 Jobs in the Bike Industry
Bike handling is all about cumulative effects and keeping your skills fresh. That's why I feel it's best to practice a little bit every time you ride. The more you practice, the more your bike becomes an extension of your body. Subtle changes in balance and body position make all the difference.
Let's get started!
It happens all the time. You're just riding along enjoying the day, then all of a sudden something pops out that you don't see until the last second or someone unexpectedly stops in front of you. What do you do?
More: Are Bike Companies Pulling the Wool Over Our Eyes?
In a perfect world you would be able to anticipate and plan your response, but that's not always possible. Most people would hit their brakes and hope for the best. This exercise is to prepare you to brake suddenly and know exactly what to do. It's about knowing how and when to use the brakes and how to use your body to counter the stopping force.
It all starts with the Ready Position.
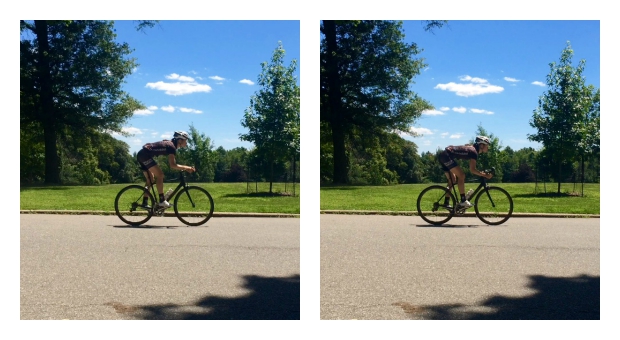
In the Ready Position you are, well, ready for anything. Here you see an example of the Ready Position on the hoods and in the drops. It's the same position, but in the drops you have more leverage on the brakes and a lower center of gravity.
Notice my crank arms are parallel to the ground with my dominant foot forward. This is important. When not actively pedaling, most people let one foot go perpendicular to the ground. With crank arms parallel, my body weight is evenly distributed and it's easier to maintain balance. I am also hovering over my saddle-- my body weight is NOT on the bike. This allows for the most maneuverability, including the ability to bring my weight back behind the saddle to counter the braking force. I'm bent forward from the hips and have a decent amount of bend in my elbows. Everything about this position allows the most control over my bike so when I brake hard I stay in control, and if I do hit something in the road I'm in the best position to counter the impact. I'm also set up for hopping over things or quickly moving around them.
Now that you know the Ready Position, here's how to practice braking hard.
Riding one-handed is important for getting in and out of your jersey pockets, eating and drinking while on the bike. It helps you develop a good feel for your bike's natural stability and lays the groundwork for riding with no hands.
Sounds simple enough, but if you want to be good at riding in a group this is the skill to have. Most people don't ride in a straight line well without practice. The term "hold your line" refers to this. We will combine this with riding one handed for an extra challenge because in the real world that's how it goes.
More: Be Cool, It's a Bike Path
Here's how to practice.
P.S. White lines can be slippery when wet. Do this drill on dry roads.
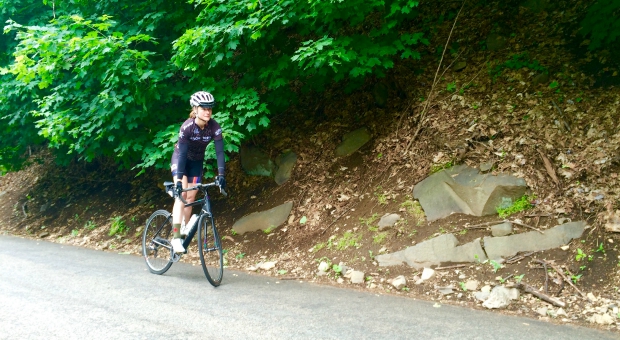
Riding slowly, 1-2 mph, is a great way to heighten your sense of balance. This will improve your confidence in slow speed situations. It will allow you to come to an almost complete stop without falling over, and quickly teaches you how subtle changes in body position affects how your bike responds. If you can ride slowly, getting through the hairpin turn on the GWB will be a breeze.
Practicing this is as simple as it sounds.
If you're nervous about falling over on pavement, try starting on grass until you feel comfortable. You can also practice with one shoe unclipped in case you need to put a foot down, or use flat pedals. If you choose to practice clipped in, make sure you are very comfortable getting out of your pedals quickly (another important skill).
2013 Tour of California Host Cities Set
The Tour of California will make history in 2013, by taking their north-to-south tradition and
How to Finish Your First Ultra Bike Race
This spring I coached Elizabeth Wicks who set a womens age 65-69 12-hour record of 172.5 miles!
Should You Train at a Non-Optimal Cadence?
Tullio Campagnolos derailleur completely revolutionized the modern bicycle, giving us up to 22
Contact management E-mail : [email protected]
Copyright © 2005-2016 Outdoor sports All Rights Reserved