I live in Boulder, Colorado and in the winter I snowshoe and cross-country ski regularly for aerobic fitness, ride on the road when I can, get on the trainer when necessary and do strength workouts in the gym.
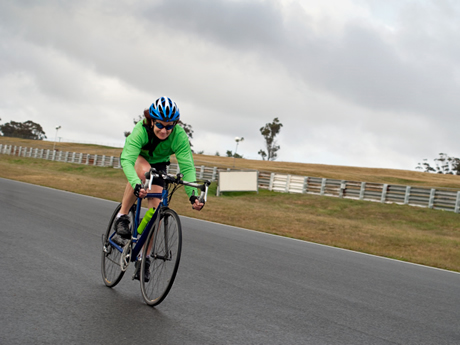
Now that the days are longer and generally warmer I'm making the transition to riding outdoors regularly. What should you be doing to be ready for spring riding?
More: How to Become a Year-Round Cyclist
If you haven't had a professional bike fit in a couple of years, get one now. After several years of training, you'll be fitter and more flexible. Your cycling goals may have changed. For all these reasons you may need a different fit.
I've seen a rider's power output increase by five percent just by improving the fit! Specialized dealers in many countries offer bike fits by technicians trained by Andy Pruitt at the Boulder Center for Sports Medicine (BCSM). Ret?l, founded by experts from the BCSM, has fit technicians around the world. Both the BCSM and Ret?l work with many racers in the pro peloton.
More: 10 Bike Fit Myths...Debunked
Before the start of the season, have your bike thoroughly checked. If you are a good mechanic, you could to this yourself, or have your local shop. The annual overhaul should include:
Shops get busier closer to events, so make an appointment early. When you take your bike in, take fresh bagels to help make friends with the shop folks.
More: 10 Things I Wish I Knew From the Start
If you've been doing lots of cross training or strength training, then you need to turn that general fitness into cycling fitness. Even if you've been riding frequently, you can improve your pedaling economy, efficiency and power. The following drills help in the transition to spring road riding:
Experienced cyclists pedal with a smooth, round stroke, applying power over most of the stroke. When you pedal, concentrate on four different parts of the stroke:
One-legged pedaling on the trainer is an excellent drill to improve your stroke. Unclip one foot and rest it on a stool, box, etc. Pedal at 50 to 60 rpm with the other leg for 30 to 60 seconds. Then pedal with both legs for a minute to recover (don't bother to clip in). Pedal again for 30 to 60 seconds with the same leg, and then with both legs to recover. Repeat sequence three to six times then switch legs. Each week try to add five seconds to the duration of the one-legged repetitions.
Many pros ride with a cadence of about 90 rpms because that puts less power into each revolution, thus fatiguing the muscles less; however, pedaling that fast may raise the heart rate. Try to find your optimum cadence somewhere between 80 and 100 rpms. Pedal at a constant speed on the trainer (or constant power if you have a power meter) and experiment with different combinations of gears and cadence to find out where you can maintain the constant speed (or power) with the lowest heart rate. That's your optimum cadence.
More: Intro to Bike Gears
Once you've found your optimum cadence you want to work on pedaling there with a smooth round stroke. Concentrate on feeling the different muscles activating in different parts of the stroke like they do when you pedal one-legged. Ride for a few minutes in that gearing. Then shift to a lower gear and ride at about 80 rpm. Every minute increase your cadence by 10 rpms. When you get to the maximum cadence you can sustain without bouncing, say 120 or 130 rpm, hold for a minute. Then work back down by 10 rpms per minute. The goal is to learn to pedal smoothly across a range of cadences.
You can improve your power on the trainer by doing intervals in the sweet spot, just below the maximum effort you could sustain for 30 minutes. How hard is that?
The appropriate sweet spot intervals for you will depend on your fitness. Warm up for at least 15 minutes including some hard pedaling. Then try to ride three to five intervals in your sweet spot zone (SS) with recovery between each. Do as many intervals as you can while staying in the SS. If you start to have trouble maintaining that effort, then stop. If you can do three intervals, then train until you can do five intervals in the SS. When you can do five intervals, then increase the duration of both the SS and recovery.
For variety you can simulate climbing by putting a block of wood (up to four inches) under your front wheel.
Sweet spot intervals are hard work and you should do no more than two SS workouts a week. Once you can ride outdoors you can also do these on the road to improve your power.
In addition to sweet spot intervals, practice sprinting to increase your power, even if you don't race. When you ride, nerves activate the muscle fibers in your cycling muscles and as you ride harder more nerve fibers are enervated. You want the nerves impulses to your muscle fibers to be precise and optimally coordinated. You can improve this by sprinting.
Ride at a your optimal cadence. Every five to 10 minutes, shift to a very hard gear (for example, 53x15) and sprint as hard as you can for 10 to 30 seconds. The goal is to improve your neuromuscular coordination.
More: Miracle Intervals on the Indoor Trainer
Ever see someone rocking side-to-side or bobbing up and down a little as the rider pedals? Moving your upper body doesn't generate any more power; it just uses energy and creates upper body fatigue. When riding on the trainer, especially when doing the above drills, check that you are riding with a quiet upper body, if possible by riding in front of a mirror.
I sometimes see riders with elbows locked and I suspect they will have sore hands and tight shoulders and necks if they ride for very long. Your core muscles should be strong enough that your hands rest lightly on the bars like you are typing and your elbows should be bent rather than supporting your upper body. Practice riding with a tight core—abdominal muscles engaged and lower back supporting your upper body. If it's uncomfortable to ride with slightly bent elbows, then check your bike fit—you may need a shorter stem.
More: 3 Core Exercises to Strengthen Your Back
You may have just selected your big event for 2013 and with the longer, warmer days you're excited to prepare. Ramp up slowly! Spring knee is a very common affliction—a form of tendinitis manifesting itself as sharp pain across the top of the kneecap. Spring knee results from increasing the miles too quickly and/or the weights in the gym. Follow these rules of thumb to avoid getting injured:
Enjoy your spring riding!
More: 4 Common Cycling Injuries...and How to Prevent Them
Hiber-Net XL: The Compact & Powerful Landing Net for Serious Anglers
Firenze MT505 Review: Reliability & Parts Availability
Choosing the Right Spinning Fishing Rod: A Comprehensive Guide

Copyright © www.mycheapnfljerseys.com Outdoor sports All Rights Reserved