2016/7/19 18:05:13
![]()
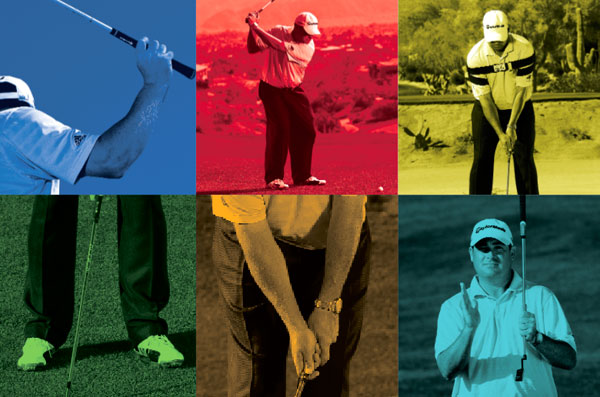 Nobody has the perfect golf swing all the time. Even the greatest golfers in the world have little ticks and flaws that occasionally creep into their swings. What separates them from us isn’t so much the flaws, but their uncanny ability to correct them. They work them out of their system faster and put their swings together quicker, more efficiently and often in better form than before.
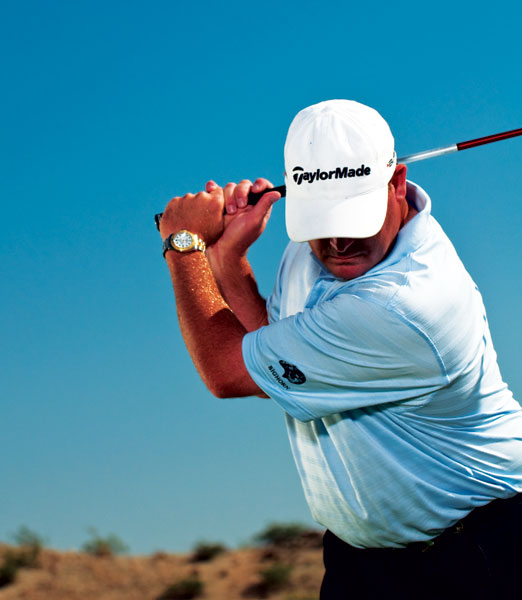
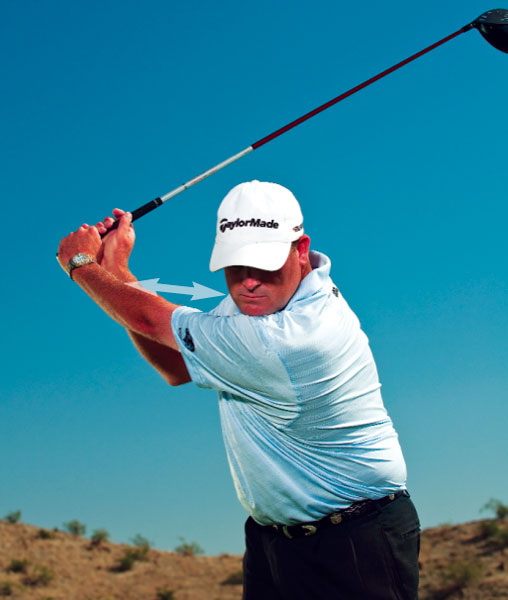 Width = More Power
I don’t promise to turn you into a Tour professional, but I do believe the following pages will help you fix your swing flaws and turn your game around. The key is in understanding not only the flaws and what they cause, but how to avoid them and ingrain better, more repeatable swing habits. Read on, and soon enough, your swing will be better than ever.
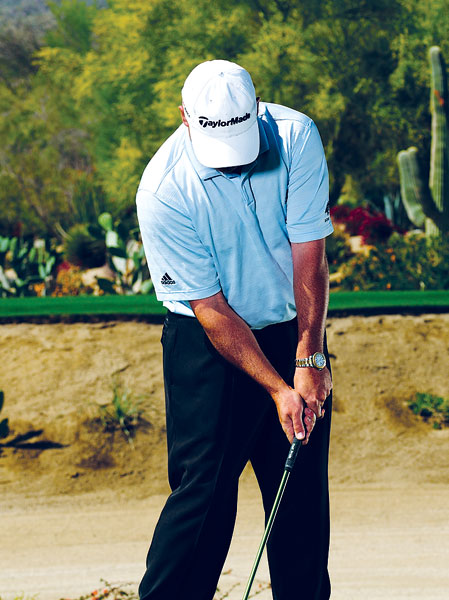
If you’re struggling with a lack of power in your golf swing, it might be due to a lack of width in your backswing. Put it this way: The greater width you have, the bigger your swing arc. The bigger your swing arc, the more room you have to increase your clubhead speed before you strike the ball. So, how do you get width? In this case, it means spacing out the distance between your right hand and right shoulder (opposite hand and shoulder for lefties). By doing this, the shoulder also will have more room to turn, meaning that both your width and torque will improve. The resulting effect? More power! {mospagebreak}
![]()
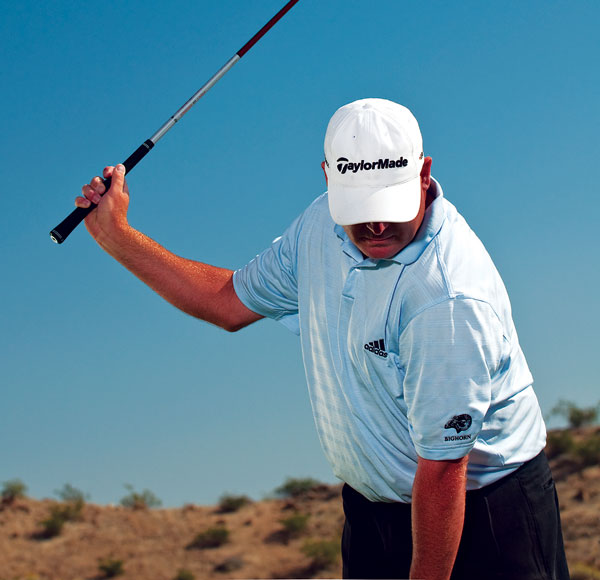
 What not to do
EQUIP Tip: Want More Width? Try A Longer Shaft If you’re looking for more width, in addition to this tip, consider adding some length to your clubshafts. The longer the shafts, the greater the arc width and the more speed you’ll generate. Even if you gain only two to three mph in driver clubhead speed, for every one mph increase, you’ll get about three to four yards in distance.
You do the math. Just be aware—if you go longer, something has got to give. In most cases, a longer shaft means less accuracy.
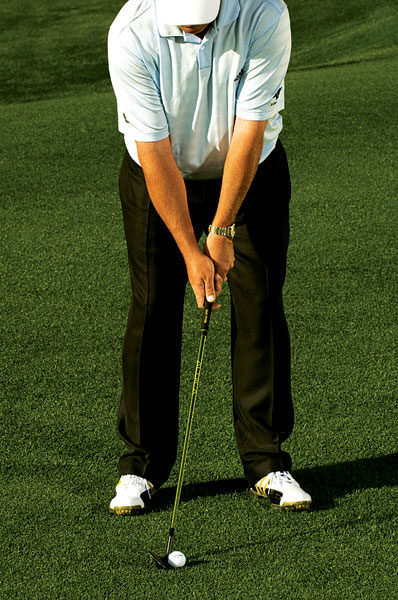
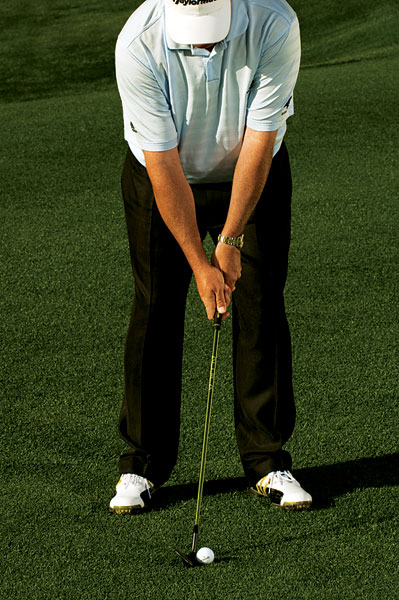
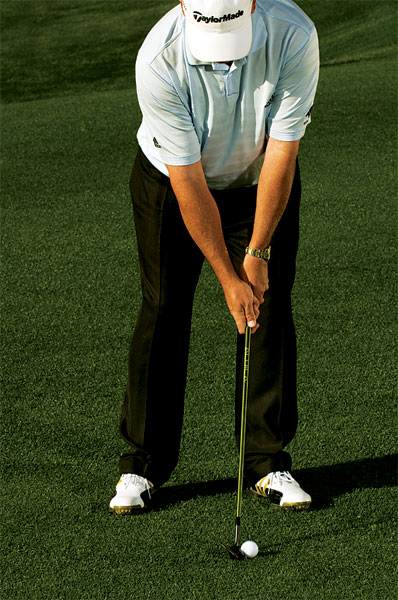
 Make solid contact
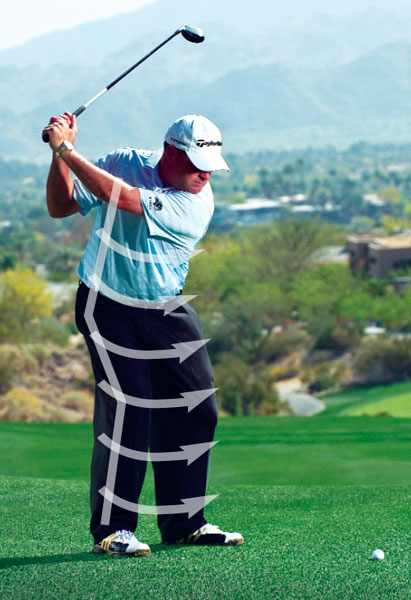
If you truly want to make solid impact (and do it more often), one aspect of the swing you need to master is controlling the flex of the right knee during the swing.
Although it may not seem as important, the flex in the knee does two things: On the backswing, it tightens your hip turn, meaning your upper body will keep turning while your lower body resists it. This is what’s known as the “X-factor,” where the upper and lower resist one another and build a ton of stored energy. Secondly, the flexed knee helps you better drive your weight into your forward side on the downswing.
What not to do: A straight leg at the top of your backswing not only messes up your swing plane, but also robs you of power and likely leads you into the dreaded reverse-pivot position. It also means you’ll be more prone to swaying away from the ball, greatly reducing your consistency and power.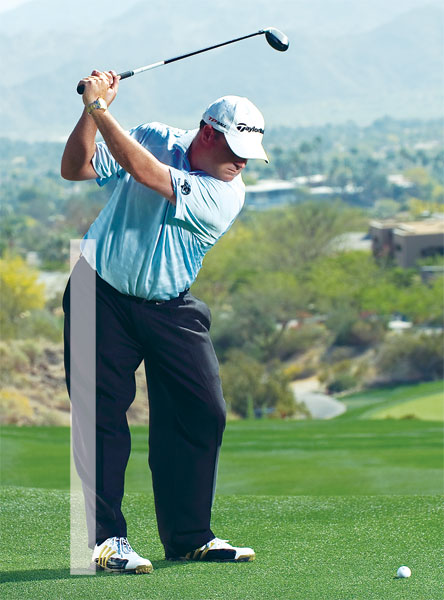
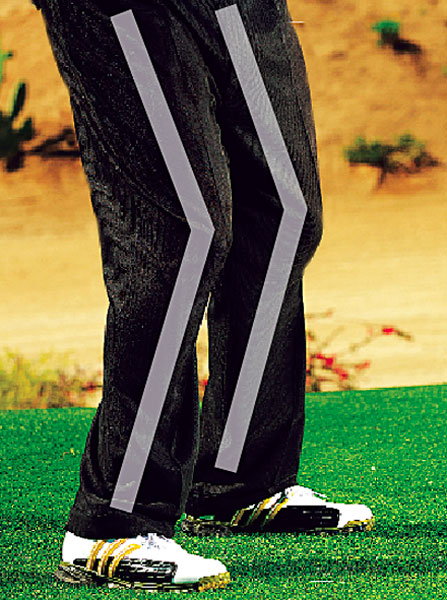 Focus Tip: Take a few practice swings, concentrating solely on keeping the right knee flexed throughout the entire swing. On the downswing, remember that the knee ought to drive toward the target and, at the finish position, should be facing directly at the target as well. Concentrate on this simple drill and you’ll see improvements in no time. {mospagebreak}
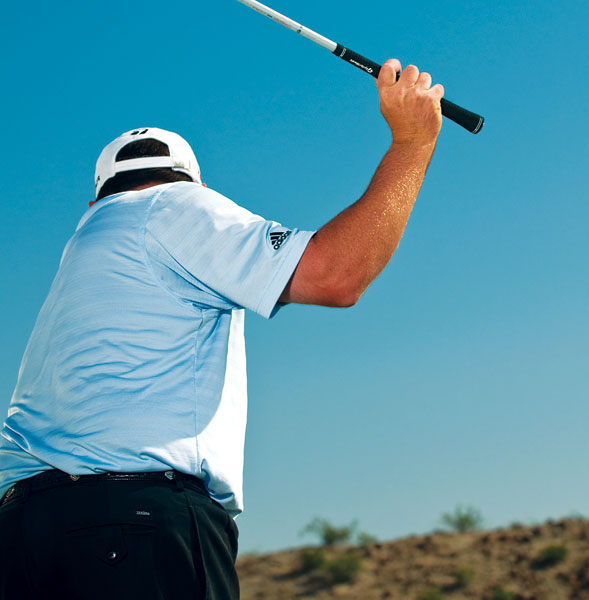
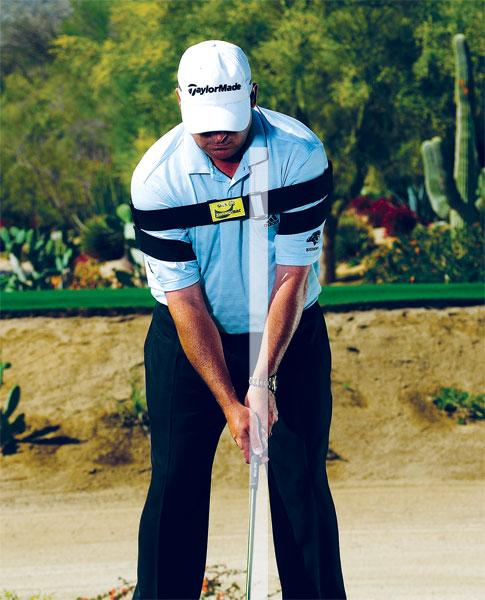
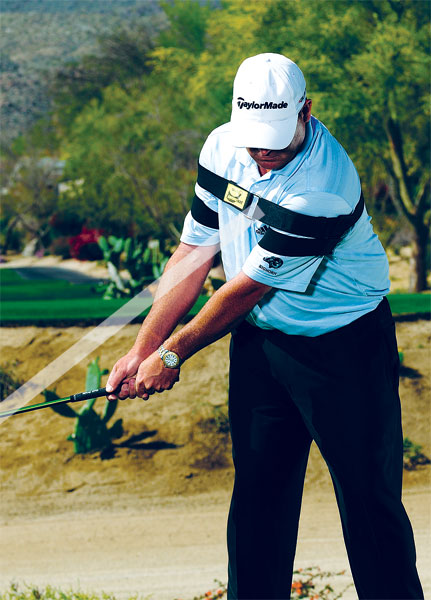
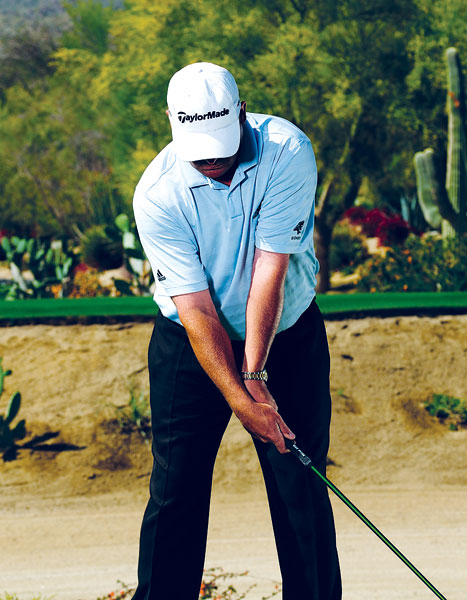
Sometimes the simplest solution to a swing flaw is the best one. In the case of shots that curve too much to the left or right, the best way to get back on track is to get your swing connected again. In the photo, I’m wearing a strap designed to keep my arms together and in front of my chest. Combine that with a shaft that’s aligned closely with my sternum, and I’m making a few simple swings using my body to turn while keeping my arms dead set in front of my chest. Go ahead and hit a few balls with this in mind, and keep the body turning in unison with the arms. If the ball curves a little left or right—play it! That’s your natural ballflight!
 Control your curvature
Hands ahead of body: Hook If your hands are too active during the swing and outrace the body, you’re likely to release too soon, either causing a wicked hook or pulled shot
Hands behind body: Slice If your hands are too far behind your body, you won’t be able to release in time, meaning the club face will be open at impact. This leads to big, ballooning slices that not only veer way right, but also do so with pithy power.
EQUIP Tip: Stay Connected There are a lot of training-aid companies that make all sorts of flexible straps designed to keep your arms together and in front of your chest.
Hop online and check out the Armaster. It will help you stay connected, as well as help you better rotate the forearms through the impact zone. You can get it at golfaroundtheworld.com.
 Distance
 Distance
 Control
With the ball forward in my stance and my hands in a high grip position, I can sweep the ball with hands that have already begun to release. This will launch the ball higher into the air. I might lose spin, but I’ll make up for it with a high launch.
With a centered ball position and neutral grip, I’ll hit a lower pitch, but with more spin than I had on the farther shot. If I want to hit it higher or lower with moderate spin from here, all I need to do is open or close the clubface ever so slightly.
From close to the green, I’m choking down on the grip and have the ball in the back of my stance. This will produce a lower shot, but with a good amount of spin to help the ball check up a little quicker.
Control
With the ball forward in my stance and my hands in a high grip position, I can sweep the ball with hands that have already begun to release. This will launch the ball higher into the air. I might lose spin, but I’ll make up for it with a high launch.
With a centered ball position and neutral grip, I’ll hit a lower pitch, but with more spin than I had on the farther shot. If I want to hit it higher or lower with moderate spin from here, all I need to do is open or close the clubface ever so slightly.
From close to the green, I’m choking down on the grip and have the ball in the back of my stance. This will produce a lower shot, but with a good amount of spin to help the ball check up a little quicker.
 While it never hurts to carry multiple wedges in the bag, it’s important you understand how each wedge performs from different distances with different ball positions and grips. In this case, I’m hitting all three shots with the same sand wedge, but with varying ball positions and grips. Practice what I’m doing here so you can get a better feel for the variety of shots your wedges can hit. Think of it this way: If you carry three wedges, that’s at least nine different shots you can play from these three distances. {mospagebreak}
![]()
 Chip the “y”
 What not to do
Stick with the lowercase “y,” not the capital “Y”! By keeping your left arm in line with the shaft, you’re effectively reducing any opportunities for error, meaning you’re more likely to hit consistent shots. Also, a hands-ahead approach means you’ll prevent dips and chunks into the ball and instead will help you hit cleaner, crisper shots.
What not to do
Stick with the lowercase “y,” not the capital “Y”! By keeping your left arm in line with the shaft, you’re effectively reducing any opportunities for error, meaning you’re more likely to hit consistent shots. Also, a hands-ahead approach means you’ll prevent dips and chunks into the ball and instead will help you hit cleaner, crisper shots.
Visually, this tip should be a cinch to master. The goal is to practice retaining the lowercase “y” formed by the left arm, the shaft and the right arm. In essence, the “y” should be present at the setup and also at impact (even though your body should be turned more toward the target). By keeping the “y” intact, you ensure your hands remain ahead of the ball and the clubface faces the target. Practice this position, and you’ll find it a lot easier to gauge shot distance and roll from different places around the green
 Putting controls
EQUIP Tip: Bounce Angles When it comes to chipping, the bounce angle of your wedges makes a big difference. If you struggle with fat shots, opt for a wedge with a higher bounce angle (the measure of angle between the leading edge and ground with the club upright). If you play on tighter lies, or if you hit the ball thin, try a wedge with a lower bounce angle.
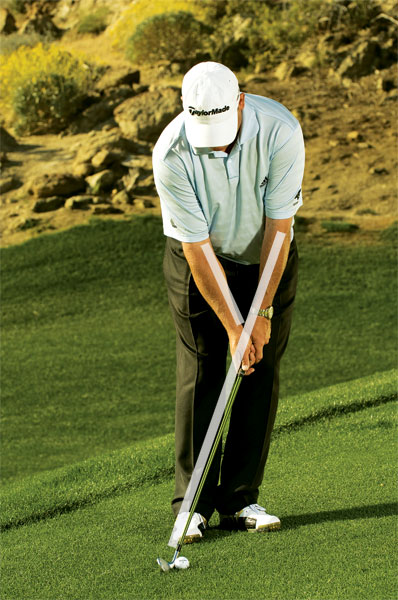
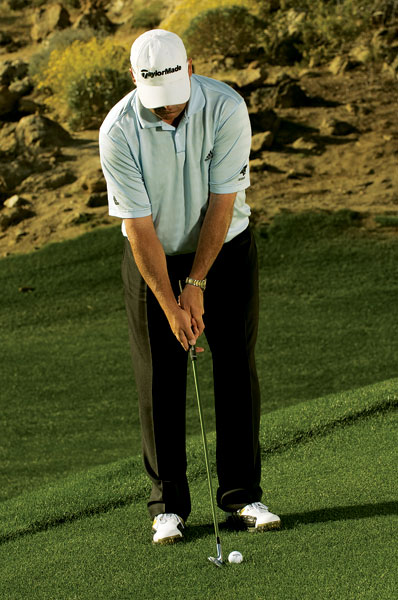
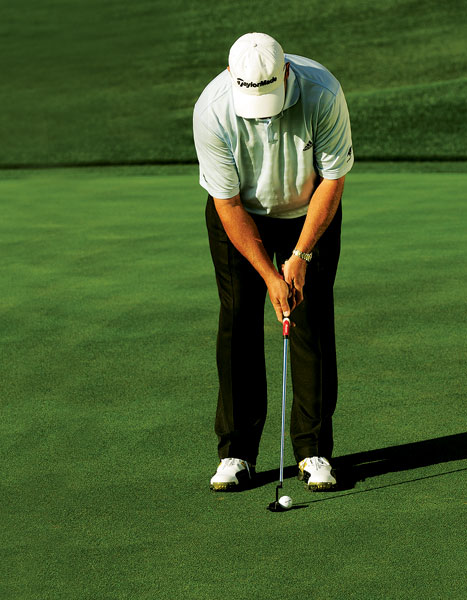
Even though the hands ought to work as a unit during the putting stroke, each hand has a specific purpose. The left hand is responsible for squaring the putterface through impact. The right hand manages the loft of the putterface, also at impact. To get both hands working as they should, practice putting with one hand at a time. With the left, work on holing 5- to 10-footers. With the right hand, concentrate on your distance control from 10 to 20 feet by getting the ball to stop no more than a couple of feet past the hole. This will train both hands to work on their respective jobs independently so they become more effective at working together come time to make a real stroke.

What Not To Do: Buy A Putter That Doesn’t Match Your Stroke Buying a new putter these days can be complicated. As much as today’s models may be billed as “one-size-fits-all,” the reality is they aren’t. Different shapes, weights, lengths and so forth all can either enhance or corrupt a golfer’s putting stroke. For instance, if your stroke is straight back and through, mallets will help you become even straighter. If you arc it, a heel-toe blade will make it easier for you. Experiment with different models so you can be sure you have the right one for your stroke.
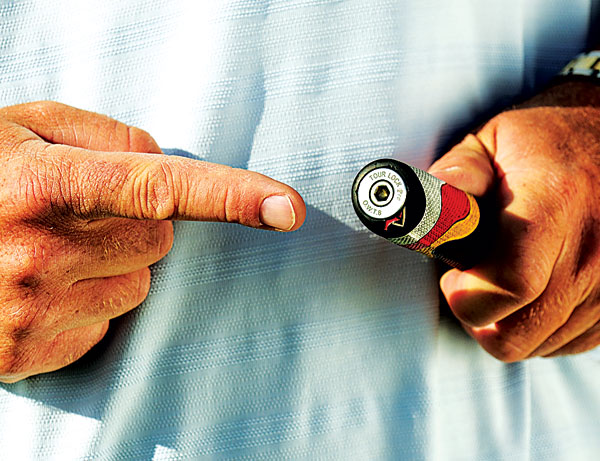 EQUIP Tip: Counterbalancing Jack Nicklaus did it with lead tape under his grip. Counterbalancing isn’t anything new, but the Tour Lock Pro has made it a lot easier and more effective. With a series of weight options to choose from, the Tour Lock Pro counterbalancing can greatly affect the feel of any club (not just the putter) and, depending on whom you ask, make your stroke steadier and more balanced. I use it in all my clubs and swear by its effectiveness. Check it out at tourlockpro.com.
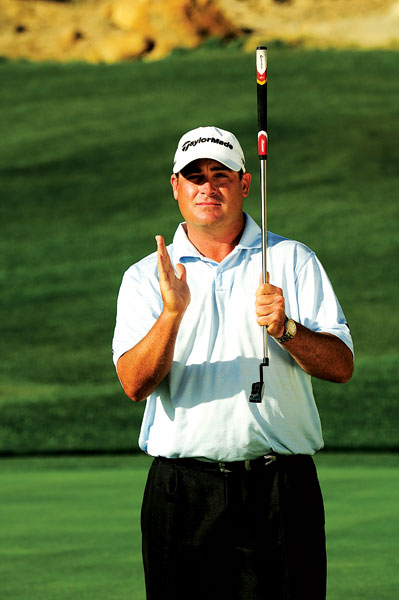
Tom Stickney is the director of instruction at Bighorn GC in California and The Club at Cordillera in Colorado.
Contact management E-mail : [email protected]
Copyright © 2005-2016 Outdoor sports All Rights Reserved