
Please allow me to show you the method that I use to construct a inline spinner. Making your own lures will help you to catch more fish by eliminating your concerns of casting that metal configuration into heavy cover. The reason most people give for not fishing the dense debris is their fear of losing an expensive spinner. Homemade inline spinners are among the most economical and easy way to make additions to keep in your tackle box. Lakes, rivers, ponds and even oceans are among the places where these spinners are used effectively for catching a wide variety of game fish species.
Here is the parts list for making these little gems:
1. Paper Clip (Straightened-used in making the wire shaft)
2. Beads
3. Worm Weight (1/8 ounce)
4. Single or treble hook
5. Size 3 Spinner blade
6. Clevis
7. Split Ring (optional)
The first step is for you is the construction of the wire shaft. This task is accomplished by using a paper clip. You form a loop on the one end using a pair of round nosed pliers. This wire shaft makes up the key component in assembling your inline spinner.
You are now ready to add the components to the wire shaft assembly. First you will add the colored beads. Try to use a combination of two different colors (one the same tone as the blade and the other red). This contrast improves the overall ability of this lure to catch fish. Red is a well known fish catching color and I try to implement it in every lure of my creation. Note: the loop makes up the front end of your wire configuration. This is where the fishing line is attached. Two small beads are now placed onto the wire and pushed up right next to the loop. These two beads are matched with the color of the blade. Next a single bead that is red is placed into the string and butted up against the two beads already on the shaft.
The clevis with the spinner blade inserted is the next item placed on the wire. This is then pushed against the red bead. After the clevis another red bead is placed and slid up to meet the clevis. So the bead on each side of the clevis is red. The contrast of having two colors allows the spinner to be seen quite easily in stained water. Immediately after the last red bead a worm sinker is threaded onto the wire shaft assembly. The small end of this cone shaped sinker is facing toward the loop in the wire. This gets butted up against the last red bead on the assembly. This device adds weight to the whole spinner allowing it to be cast at longer distances. There is no need to paint this item, but you certainly can if you have the desire. Right after the worm weight you will add a larger bead onto the shaft. Now put at least two of the smaller beads (of the same hue as the spinner blade) on the wire and push them against the larger bead. These beads add space as well as symmetry to the spinner's body. This makes a nice profile for your spinner.
A second wire loop is now constructed onto the wire shaft. Either your hook or a split ring is put inside the loop before the final turns of the wire are made. The split ring will allow the hooks to be changed in an easier fashion than by having to cut the hook off the shaft in the other method of attachment. The final step in the construction of your inline spinner is that of cutting off the tag end of the twisted wire after the loop. If catch and release fishing is what you mainly pursue then a single hook can be used. Also remember to press the barb of the hook down. This makes it almost too easy to unhook and release the fish. Your first inline spinner is now complete. Go ahead and give it a try on your next fishing trip. Who knows you may just get the urge to throw that spinner into heavy cover. If you do that ... hold on tight as you may just catch your fish of a lifetime. Good luck! Thank you for reading this article.
The following image is one where a single hook is used and the body is slightly modified by using two 1/16 ounce worm weights with a large bead in the center. Another plus with homemade lures-experimentation and creativity.

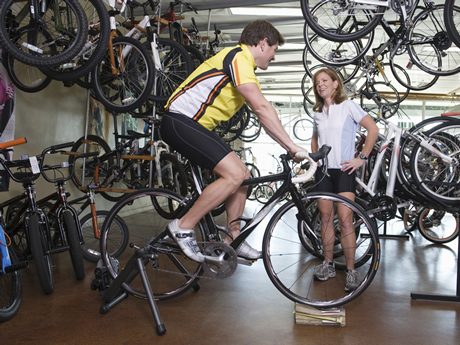
4 Traditional Indoor Cycling Workouts With a Twist
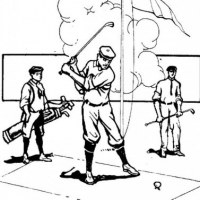
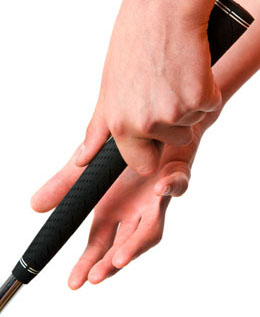
How to Replace Golf Clubs Grip
Copyright © www.mycheapnfljerseys.com Outdoor sports All Rights Reserved