Without question, the draw is golf's most difficult shot for players to learn. It takes great timing, coordination and trained muscles to swing in the proper sequence, square your clubface and put the desired right-to-left spin on the ball. Over the next few pages, I'll demonstrate five different tips that will get you hitting the ball farther, more consistently and out of the right rough for good!
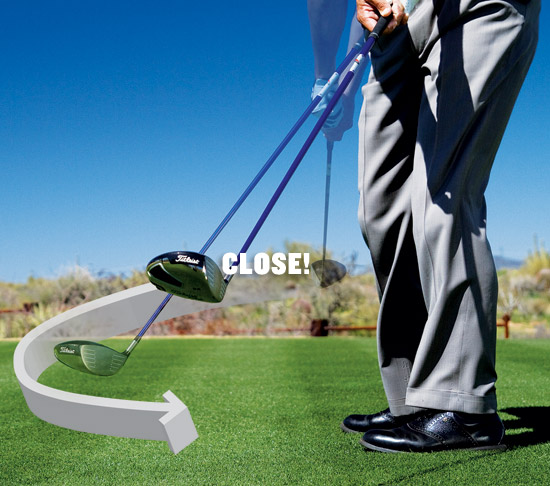
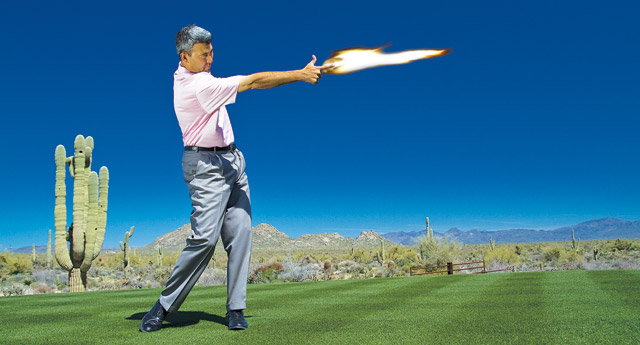
1. CLOSE THE CLUBHEAD THROUGH IMPACT To draw the ball, you must learn to close your clubface slightly through impact. While many players rotate the clubface open as they approach impact and go through it, you need to learn to close the face as you release it.
Notice, in this photo, how I'm rotating the clubface as the club approaches and passes impact. If I leave the face open after impact, I won't hit a draw. In fact, I'll slice it. Rotating the face releases the club and puts draw spin on the ball.
The next time you're at the range, make some swings where you try to roll your right forearm over your left, so that in the followthrough, the bottom of your right forearm actually touches the bottom of your left forearm. After you've done that for a bit, you might be snap-hooking the ball. If so, dial it back a bit so that you retain the sensation of rolling your right forearm over your left, but not so extreme that they touch. This will get your clubface closing through impact and your ball drawing!
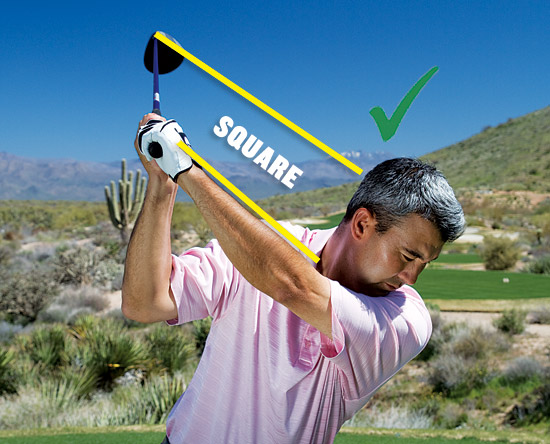
2. KEEP YOUR LEFT WRIST FLAT Checking your clubface's position at the top of the swing is a great way to make sure you're prepared to start your downswing. To hit a draw, your clubface should be square or slightly closed at the top.
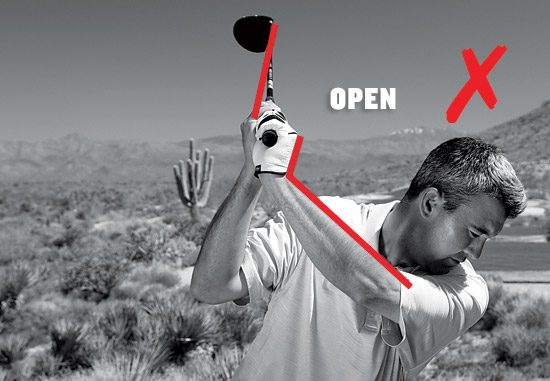
Check out the bottom photo. Notice how my left wrist is in a cupped position and the leading edge of the club is hanging vertically. My clubface is really open. This makes it a lot more difficult to hit a draw; you'd really have to manipulate the club on the way down. It's possible, but I don't recommend it.
Now look at my left wrist in the top photo. Notice how much flatter it is at the top and how the leading edge of the clubface basically matches it. From this square position, I have a much better chance to hit a draw. You can check this position either in a mirror or by simply swinging to the top and looking up at your hands and the clubface.
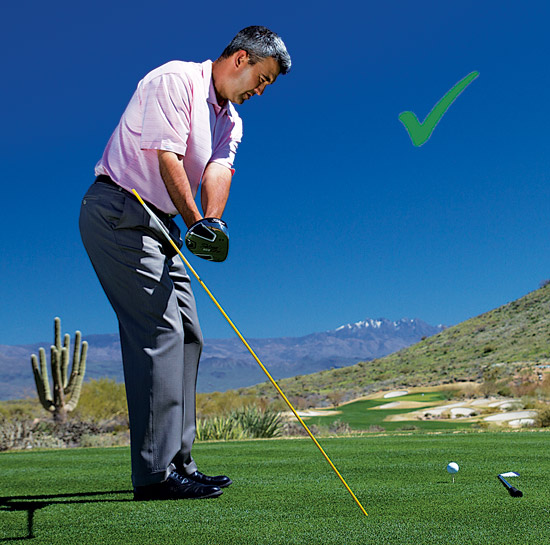
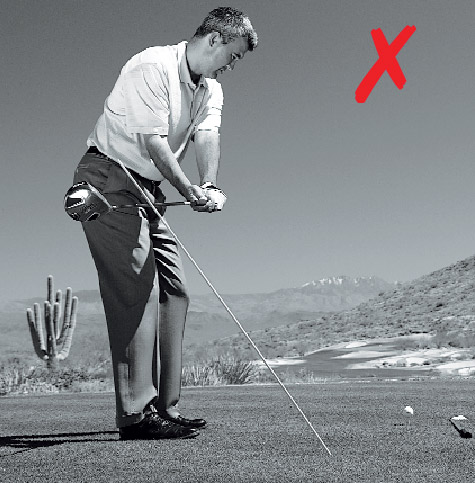
3. WATCH YOUR BACKSWING PLANE In the bottom photo, you can see that I've swung the club well to the inside of my target line on the backswing. In many cases, this leads to an open clubface and arms that lift the club as it works its way to the top of the swing. Unfortunately, from that position, there's really nowhere to go but over the top, in which case, the upper body unwinds before the lower body, and the clubface cuts across the ball, leading to a slice or pull.
In the top photo, however, you can see that I'm swinging the club slightly to the inside of my target line and I'm keeping the clubface square. Doing so helps me actually start my downswing on a slightly inside path, just the approach I need to turn the club over and apply some of that much needed draw spin.
Here's how to do it: Place a stick in the ground about three feet behind you on the same angle of the club with which you're practicing. It should be placed just outside the target line, as well. Then make a backswing so that your clubhead is just inside the stick. On your downswing, make sure that your clubhead travels inside that stick. If it moves too far outside it, you'll hit it.
The key to getting your swing on the right track is to make a backswing where the clubhead is moving just inside the stick. It's easy to swing the club too far inside as you try to make sure you miss it. Just barely miss it on the backswing, and then go to the top of your swing.
The more important part of this drill is to make sure the club is swinging under the shaft on the downswing. If you come over the top, you'll hit the stick. Make sure you let your arms and club drop to the inside as you start your downswing, and you'll swing from the inside, and the stick will be unharmed.
You might start this drill at half speed to get the feel of where the club should go and then increase the speed of the swing as you become more comfortable.
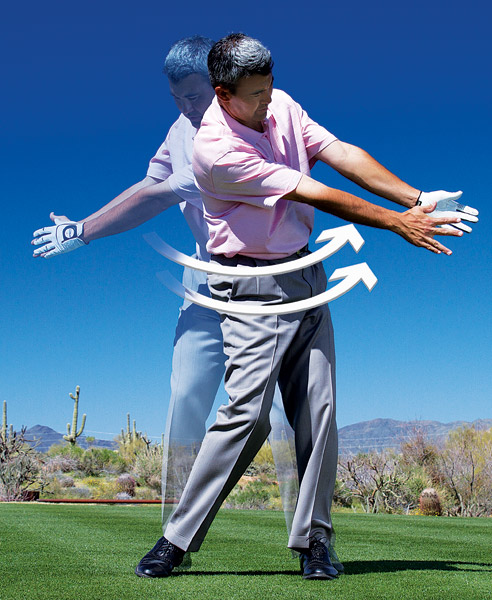
4. LEARN TO ROTATE A great way to feel the proper rotation of the arms is to swing without a club, to feel like you're making a level swing back and through. When you swing like this, you should feel as though your arms will naturally want to rotate, much like a tennis player putting topspin on a shot. Do this a few times, then grab a club and repeat that feeling. Finally, bow forward into your golf posture and make some swings, feeling the same rotation. Tee up a ball and give it a go. It should be pretty easy to turn it over. Now the trick is to get that same feeling when the ball is on the ground.
5. WATCH YOUR FINISH Many golfers have been taught to swing up the line and finish high. Doing so, unfortunately, doesn't allow you to release the club through impact. As you can see in the photo above, I've chased the ball up the line into a high finish. I haven't let my arms and body rotate or turn through the shot. This leads to a fade or block.
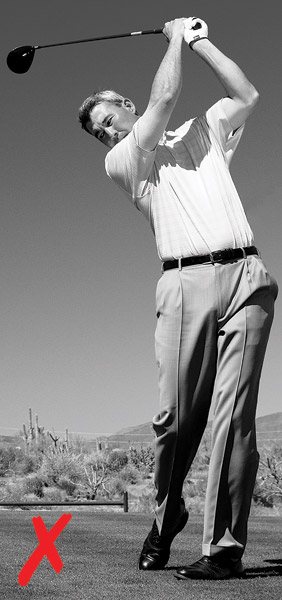 Swinging up the line leads to poor rotation, a bad weight shift and a fade or block.
 My right shoulder points at my target. The club finishes more around. Notice my right foot? Nearly all my weight has transfered to my left side.
In the photo at right, however, I finish more around, which promotes a good turn through the ball and good rotation of the arms (and, therefore, a square clubface at impact).
To find the perfect low finish, make three swings: one so you swing at chest height, one so you swing at knee height, and the last is a normal golf swing. Retain the feeling with all three of these finishing swings, with the club rotating around you, almost like a baseball swing. Then apply that to your normal swing.
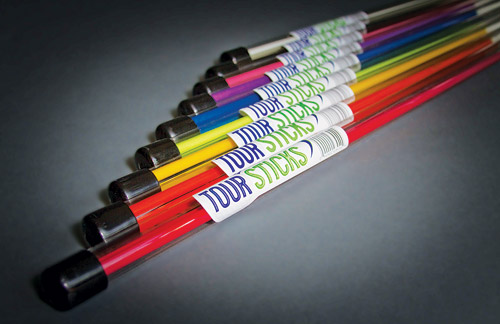
Get Aligned!
Used by more than 100 PGA Tour pros, the portable, multifunctional Tour Sticks can be used in over 15 different practice drills to improve one's alignment, as a plane indicator, as a swing guide or to help with ball setup or target practice. Made from durable, high-quality fiberglass to prevent breakage, the Tour Sticks come as a pair in both adult and junior sizes and have a pointed tip at one end to stick in the ground for swing plane drills. toursticks.com.
Steve Dahlby, PGA, is the director of instruction at Forest Highlands Golf Club in Flagstaff, Ariz. He's also the lead instructor of swingmentors.com and can be found at The Golf Club Scottsdale and McCormick Ranch Golf Club in Scottsdale during the winter months. Steve has worked with numerous players on the PGA and LPGA Tours.
Understanding Track Flare and Increased Hook Potential
Rio Grande River Fishing Expedition: Day 2 Journal Excerpts

LBAA Red River Tournament Results: Lady Bass Anglers Shine

Copyright © www.mycheapnfljerseys.com Outdoor sports All Rights Reserved